Subscriber Benefit
As a subscriber you can listen to articles at work, in the car, or while you work out. Subscribe Now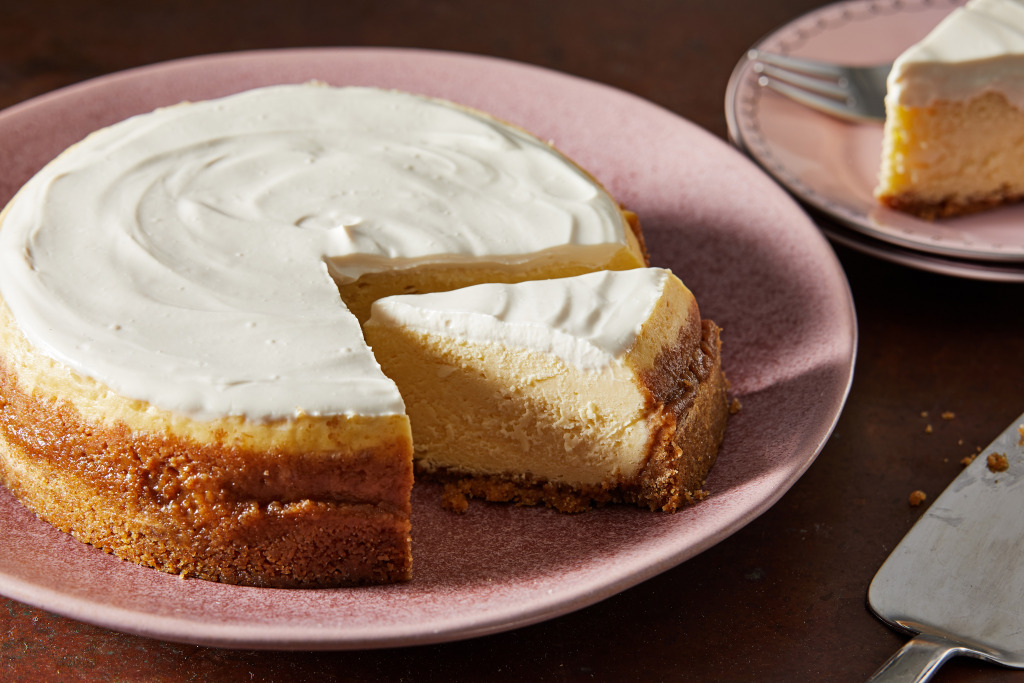
I am an Instant Pot enthusiast and am not afraid to say so. I use it to feed my family on the regular because, as many of my fellow IP-lovers know, it “cooks” a variety of items (steel cut oats, large cuts of meat, beans, rice) much more quickly and with less mess (and often equally as well, if not better) than my oven or stovetop.
No, my kitchen does not fill with the aroma of warming beef stew or bacon-y black beans, when I employ my Instant Pot for meal-making, but it also does not heat up uncomfortably as I race around trying to get dinner on the table post-work. Moreover, because it does triple duty as a pressure cooker, slow cooker and rice cooker, it saves valuable kitchen space and money.
For all these reasons, I adore it.
But for the past year and change, I have begun using my Instant Pot not only to assemble savory dishes, but to make dessert, as well, and it is fair to say that my love for the-most-versatile-countertop-appliance-in-the-land has grown exponentially – and that is saying something.
Not every sweet lends itself to “baking up” in the steamy environment that is the IP. But if you choose your treats wisely, like those with a texture that benefit from said cooking atmosphere – cheesecake and bread pudding, I’m looking at you – the rewards are many (including time saved, stress avoided – more on that below – and the creamiest and dreamiest of sweets savored). Moreover, Instant Pot desserts tend to be on the petite-side, making them especially fitting for this particular holiday season when we are gathering with, and feeding, fewer folks than is the norm.
Here are the best desserts to make, the tools you’ll need and all the tips and tricks you’ll want in your (apron) pocket when “baking” in your Instant Pot.
The Instant Pot excels at “baking up” luscious, custards and puddings, cakes with a dense, moist crumb; think sticky toffee pudding or dense “snacking cakes” (since the IP only “bakes” a single layer of cake at a time anyway, it is perfect for snack cake-making), creme brûlée, rice pudding, flan, clafoutis, chocolate pots de creme, lemon pudding cake, and the aforementioned cheesecake and bread pudding.
In essence, all the treats that benefit from water baths are excellent candidates for the Instant Pot (and then some), but without any of the hassle of filling said water bath, carrying said water bath to the oven, spilling said water bath – you get the picture. And because such desserts are conventionally baked low and slow, the Instant Pot saves you actual time, as well as figurative time spent worrying about fluctuating oven temperatures and the like. Once the Instant Pot reaches pressure/temp, it just stays that way.
Tools and tips: A round pan that is 7-inches in diameter fits well in a 3-, 6- or 8-quart IP – and a metal one with a removable bottom is clutch for cheesecakes; and one without, for variety, is useful for other desserts, such as snack cakes or custards.
You will also need a trivet, with handles, to keep the pan of food above the water level in the Instant Pot. If your trivet does not have handles, you can make a sling with a 20-inch piece of aluminum foil, folding it up the long side into a 4-inch wide strip. Place your pan on the center of the strip and use the two long ends to lower it in and out of the pot. Pro tip: You can save the sling and reuse it.
If you don’t have a trivet, you can create a makeshift one using a thick coil of aluminum foil, shaped into a 7-inch circle. Place it in the bottom of your pot and carefully rest your pan on top of it. Or you can use an upside-down heatproof bowl, a cake pan or thick cookie cutters. Just be sure that whatever you use is tall enough to keep your pan above the water level.
Foolproof and forgiving: Though making desserts in an Instant Pot removes many of the variables one confronts when baking in an oven, each Instant Pot is slightly different from the next. Your pot might come to pressure more slowly than mine or release its pressure more quickly; and your cheesecake might have only a slight jiggle in the center after the allotted time, whereas mine might be quite wobbly.
But here’s the thing I have learned after much baking under pressure: The beauty of the IP is that none of that matters. If the recipe says the pot will come to pressure more quickly than it does or release pressure more slowly than it does, that’s OK. And if after the allotted time, your treat is slightly underbaked for your taste, you merely place it back in the pot for a few extra minutes.
It’s close to impossible to overbake in the IP, and underbaking is an easy fix.
Finishing touches: Because of its wet environment, the Instant Pot does not always produce the prettiest of desserts. There are no burnished edges or browned tops because when we bake in an Instant Pot, we do so to achieve creamy textures, to save time and to remove guesswork.
But Instant Pot desserts can still be striking when we dust them with confectioners’ sugar or cocoa powder, when we top them with brightly hued fruit compote or dollop them with lightly whipped cream; or when we glaze them with ganache or caramel.
Baking in the Instant Pot, just like cooking in it, frees up room in your (sometimes finicky) oven, keeps your kitchen cool, is less messy and faster than conventional baking and works absolute magic with so many of our favorite holiday/anytime desserts. Give it a try. Baking under pressure might be just the easy, sweet-making shortcut for which you didn’t even know you’ve been longing.
– – –
Instant Pot Vanilla Cheesecake
Active time: 30 minutes | Total time: 1 hour (plus 5 1/2 to 6 hours’ chilling time)
8 servings (makes one 7-inch cheesecake)
If you want to see the Instant Pot really strut its stuff, try using it to “bake” a cheesecake. The dreamy, creamy cake that emerges from your IP will be crack-free (pressurized cheesecakes never crack), with an exceptionally lush texture. Its petite size makes it perfect for entertaining small groups.
The top of your cake may need a little love when it emerges from the pot. Hide any imperfections with a topping of lightly whipped sour cream. The tartness of the sour cream plays nicely with the cream cheese. Or you may simply dust it with cocoa powder or cover it with fresh or macerated berries. This recipe works in a 3-quart Instant Pot or larger.
Make Ahead: The cake can be made and refrigerated up to 48 hours before serving.
Storage Notes: Leftover cake can be loosely covered and refrigerated for up to 2 days.
INGREDIENTS
FOR THE CRUST
1/4 cup (55 grams) unsalted butter, melted, plus more softened butter for greasing the pan
1 1/4 cups (145 grams) very fine graham cracker crumbs (from 1 sleeve/9 graham crackers finely ground in a food processor, or crushed in a zip-top plastic bag with a rolling pin; see NOTES)
1/4 cup (50 grams) granulated sugar
1/8 teaspoon kosher salt
1/2 teaspoon vanilla extract
FOR THE FILLING
2/3 cup (130 grams) granulated sugar
4 teaspoons cornstarch
1/2 teaspoon kosher salt
1 pound (455 grams) cream cheese, room temperature
1/3 cup (80 milliliters) heavy cream, at room temperature
1 tablespoon vanilla extract (may substitute paste from 1 bean)
2 large eggs, at room temperature
1 large egg yolk, at room temperature
FOR THE TOPPING
3/4 cup (180 grams) sour cream
3 tablespoons confectioners’ sugar
1 teaspoon vanilla extract
Fresh berries, for serving (optional)
DIRECTIONS
Lightly grease the bottom and sides of a 7-by-3-inch round cake pan with a removable bottom with the softened butter or cooking spray. Cut out a circle of parchment and use it to line the bottom of the pan.
Make the crust: In the bowl of a food processor, process the crumbs, sugar and salt until combined, about 30 seconds. Add the melted butter and vanilla and process until the crumbs are uniformly damp, about 30 seconds more. (Alternately, in a large bowl, combine the crumbs, sugar, salt, butter and vanilla and mix with a flexible spatula or with your hands.)
Transfer the crumbs to the prepared pan and, using your fingers, press firmly into the bottom of the pan and about 1 inch up the sides. Transfer to the freezer while you prepare the filling.
Make the filling: In a small bowl, whisk together the sugar, cornstarch and salt until combined.
In the bowl of a stand mixer fitted with the paddle attachment, or using a large mixing bowl and a hand mixer, mix the cream cheese on low speed until smooth, 30 seconds to 1 minute, stopping the mixer and scraping the bowl with a flexible spatula as needed.
Slowly, add the sugar mixture until combined, stopping the mixer and scraping the bowl as needed, about 1 minute.
Add the heavy cream and vanilla and mix on medium just until combined, about 30 seconds. Add the eggs and yolk, one at a time, and mix only until combined, scraping the bowl as needed.
Using a flexible spatula, gently fold the filling one last time and pour it into the prepared pan. The filling will rise above the edge of the crust.
Add 1 cup of water to the insert of your Instant Pot or multicooker. Use the trivet’s handles or an aluminum sling (see NOTES), to lower the cake into the pot. Cover, set the steam valve to PRESSURE (or SEALING) and turn to HIGH. After the cooker reaches high pressure, which takes 5 to 10 minutes, cook for 26 to 30 minutes (at 26 minutes, the center will be slightly softer and creamier than the edges and the cake a bit more lush; at 30 the cake is set and dense – in the best cheesecake way possible).
Let the pressure release naturally, 20 to 25 minutes, then take the lid off. Water will have accumulated under the lid and, as you remove it, it will drip on the cake. Do not worry – simply blot up the water with a paper towel.
Carefully lift the pan from the pot using potholders and the trivet handles or foil sling. Place it on the heatproof surface (the trivet serves as a wire cooling rack) and very gently run a thin knife around the perimeter of the warm cake. Let the cake cool to room temperature, about 1 hour and 30 minutes.
Cover with plastic wrap, transfer to the refrigerator and let chill for at least 4 hours and preferably overnight.
Remove the sides of the pan from the cake, running a knife around the edge again to dislodge it, if necessary. Remove the pan bottom by sticking a long knife between it and the parchment paper. Peel off the parchment and place the cake on a serving plate.
Make the topping: In a medium bowl, whisk together the sour cream, confectioners’ sugar and vanilla extract until combined. Spread over the top of the cake. Chill the cake for another 30 minutes, or until the topping has firmed.
For clean slices, use a large knife dipped in hot water and dried between each cut. Add berries to the plate or top of the cake, if using.
NOTES: To crush the graham crackers: It is best to use a food processor to turn the crackers into fine crumbs. If using a rolling pin and a zip-top bag to crush the crackers, you may need to use your hands to break up larger chunks.
To make a tinfoil sling: Fold a 20-inch rectangular piece of heavy-duty aluminum foil into a strip about 4 inches wide. Place the strip into the Instant Pot to test its size and bend it up to create handles. Place the foil strip under your pan and lower it into the pressure cooker using the foil “handles.” To remove, use a kitchen towel or mitts to grab the foil handles to lift out the pan.
Nutrition | Calories: 544; Total Fat: 39 g; Saturated Fat: 21 g; Cholesterol: 172 mg; Sodium: 413 mg; Carbohydrates: 42 g; Dietary Fiber: 0 g; Sugar: 35 g; Protein: 7 g.
Recipe from cookbook author Jessie Sheehan.
– – –
Instant Pot Cranberry Bourbon Bread Pudding
Active time: 15 minutes | Total time: 1 hour 10 minutes
8 servings (makes one 7-inch bread pudding)
Bread pudding is an easy, comforting and homey dessert that makes great use of stale, leftover bread. But what is truly game-changing about bread pudding is that you can make one with the silkiest of custards in almost half the time in your multicooker, which creates a steamy environment that custards love.
Here, we call for challah or brioche, but if all you’ve got is a baguette or sourdough boule, use it. The same holds true for the dairy, spices, flavorings and add-ins. If your bread is fresh, cut it into cubes, place on a rack set over a baking sheet and leave it uncovered on the counter overnight.
Keep in mind that the pudding won’t have a lovely bronzed top when cooked this way, so a dusting of confectioners’ sugar and a drizzle of heavy cream is recommended for serving. This recipe works in a 3-quart Instant Pot or larger.
Make Ahead: The pudding can be made and refrigerated, covered with its foil cap, for up to 1 day before serving. To reheat, keep the foil on, and warm in a preheated 350-degree oven for 15 to 20 minutes.
Storage Notes: Leftover pudding can be covered and refrigerated for up to 4 days.
INGREDIENTS
Unsalted butter or cooking spray, for greasing the pan
3/4 cup (150 grams) granulated sugar
1 teaspoon kosher salt
1 teaspoon ground cinnamon
1/4 teaspoon ground cardamom
1 3/4 cups (415 milliliters) heavy cream, plus more for serving
2 tablespoons bourbon, or more to taste
2 teaspoons vanilla extract
2 large eggs
2 large egg yolks
12 ounces (340 grams) cubed stale brioche or challah (8 to 10 cups)
3/4 cup (75 grams) cranberries, fresh or frozen, no need to defrost, coarsely chopped (may substitute blueberries, coarsely chopped strawberries, blackberries or raspberries)
Confectioners’ sugar, for serving
DIRECTIONS
Grease a 7-inch round baking pan with butter or cooking spray.
In a large bowl, whisk together the sugar, salt, cinnamon and cardamom. Whisk in the heavy cream, bourbon and vanilla. Whisk in the eggs and yolks one at a time, incorporating each fully before adding the next. Add the bread and cranberries and, using a flexible spatula, stir until the bread absorbs most of the custard. Transfer to the prepared pan and cover with a piece of aluminum foil.
Add 1 cup of water to the insert of your Instant Pot or multicooker. Use the trivet’s handles or an aluminum sling (see NOTES), to lower the pudding into the pot. Cover, set the steam valve to PRESSURE (or SEALING) and turn to HIGH. After the cooker reaches high pressure, which takes 5 to 10 minutes, cook for 35 minutes.
Let the pressure release naturally, 20 to 25 minutes, then take off the lid. Carefully remove the bread pudding from the pot using oven mitts and the trivet handles.
Remove the aluminum foil, and if you would like to slice rather than scoop your pudding, run a knife around the edge of the pudding and invert it onto a cooling rack and then right side up onto a serving plate.
Serve warm with powdered sugar and a drizzle of heavy cream, or with a brown sugar bourbon glaze (see NOTES).
NOTES: To make the brown sugar bourbon glaze, in a small saucepan over medium heat, melt 4 tablespoons (55 grams) of unsalted butter. Whisk in 2/3 cup (130 grams) of light brown sugar, 1/4 cup (60 milliliters) of heavy cream, 2 tablespoons of bourbon, 1/2 teaspoon of vanilla extract and 1/4 teaspoon of kosher salt. Raise the heat to medium-high and bring to a boil, whisking constantly, until thickened, 3 to 5 minutes. Remove from the heat and let cool slightly. Drizzle the glaze over the bread pudding, then slice and serve. If you like, drizzle a little extra glaze on each slice.
To make a tinfoil sling: Fold a 20-inch rectangular piece of heavy-duty aluminum foil into a strip about 4 inches wide. Place the strip into the Instant Pot to test its size and bend it up to create handles. Place the foil strip under your pan and lower it into the pressure cooker using the foil “handles.” To remove, use a kitchen towel or mitts to grab the foil handles to lift out the pan.
Nutrition | Calories: 412; Total Fat: 24 g; Saturated Fat: 13 g; Cholesterol: 164 mg; Sodium: 383 mg; Carbohydrates: 43 g; Dietary Fiber: 4 g; Sugar: 23 g; Protein: 7 g.
From cookbook author Jessie Sheehan.
Please enable JavaScript to view this content.